It’s been a very busy weekend.
In my mad dash to finish the nursery AND start taking cloth diaper pictures for my planned review series, I managed to completely flop on Valentines Dinner.
A lovely roast beef with potatoes, brussels sprouts (we like them, ok?) and Yorkshire pudding sadly turned into an overdone crock pot roast with peas and mashed potatoes. And no Yorkshire pudding, because ain’t nobody got time for that apparently. The potatoes were the best part.
PLUS, I was going to make Chris a cheesecake for dessert, but I didn’t have a springform pan on Friday, and I was dead set on a recipe that called for one. I wasn’t interested in adapting the recipe for a pie plate, or choosing a different recipe that I could make in something I had on-hand. And considering that cheesecake really does need to sit overnight, I was hooped for Valentines dessert.
But then, my lovely husband saved the day! Not only did he get chocolate fudge ice cream for dessert, but he also gifted me a glass-bottom springform, and I was ready to go! His Valentines gift to me was something in which I could make a Valentines gift to him. Funny how things work out like that!
So my Saturday was spent sorting cloth diapers, making cheesecake, squeezing in a mediocre dinner and watching the most romantic movie of all time, the 1989 Batman.
Thankfully, things mostly came together on Sunday for what I like to call “Valentines Day, Take 2”.
I say mostly, because I still spent a lot of the day in frustration. This time, it was over the quality of my photographs.
My condo has zero natural light unless I wake up first thing in the morning and hope to catch some rays before the sun travels to the other side of the building. I took so many pictures but had to dump most of them due to blurriness or inadequate light.
You can see in my cheesecake pictures, even my clearest ones aren’t that great. I guess I’m just one of those adult learners who gets pissed off when I can’t immediately master something like a DSLR camera.
But what I lack in photographic genius, I make up for in culinary amazeballs, because the cheesecake you see in this post was literally the. best. cheesecake. I’ve. ever. had.
I adapted it from Ina Garten’s recipe on Foodnetwork.com, tweaking just a couple of things.
Ingredients
For the crust:
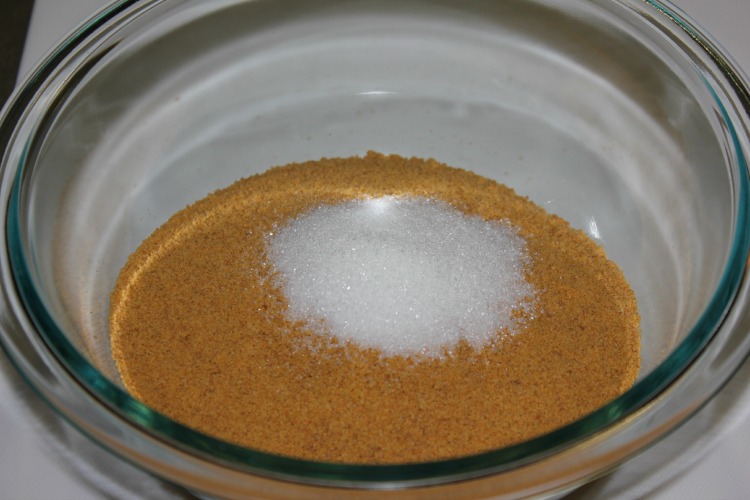
1 1/2 cups graham cracker crumbs
1 tablespoon sugar
6 tablespoons (3/4 stick) unsalted butter, melted
For the filling:
2 1/2 pounds cream cheese (which works out to five 8oz packages), at room temperature
1 1/2 cups sugar
6 whole large eggs, at room temperature
1 large egg yolk, at room temperature
1/4 cup sour cream
zest from 1 lemon
1 1/2 teaspoons pure vanilla extract
For the topping:
1/2 cup sugar
3 tbsp water
1 500g package of frozen raspberries
What I did:
I started off by pouring the graham cracker crumbs into a bowl. Somehow, some extra crumbs fell into my mouth. I wonder how that happened.

I added the sugar and melted butter, mixing together until combined. I wondered if my crust mixture was a little wet, as I more or less eyeballed ¾ of a stick of butter from one of those stupid butter bricks. There’s apparently a shortage of butter in stick form in Fort McMurray right now.
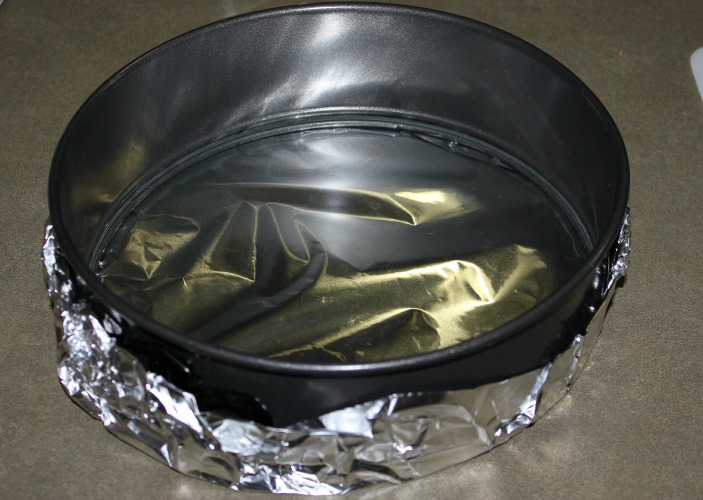
Anyway, before I emptied the crust mixture into my pan, I wrapped the pan in tinfoil. The reason for this was to keep anything that may ooze out (like extra butter) to be caught in the tinfoil instead of dribbling on the bottom of the stove.
Then, I spread the mixture all over the bottom of the pan and about one inch up the sides. That part was difficult because the mixture kept wanting to break and fall back down.
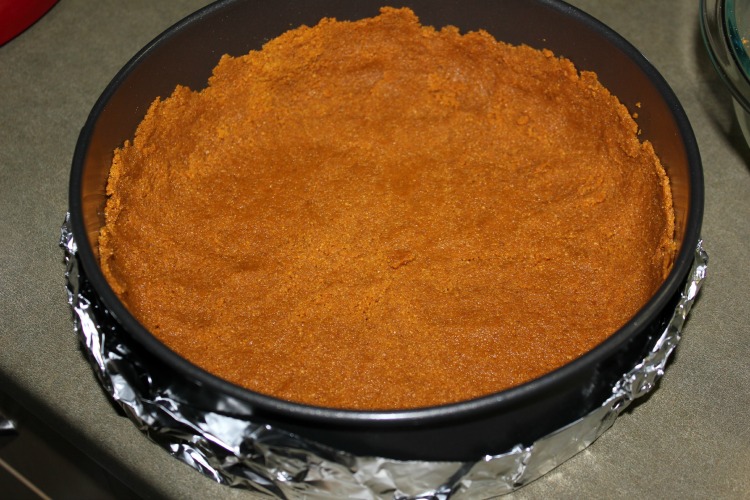
I baked the crust just on its own in a 350 degree F oven for 8 minutes, but I don’t really know what the point of that step was. All it really did was make it a little extra butter-melty.
In the meantime, I started working on the filling ingredients. Now here is where I deviated from the recipe a bit. Ina Garten’s recipe calls for extra large eggs, which I glossed over again and again until I started actually making it and realized I only had large eggs. After a quick google search, I decided to turn one of the egg yolks in the original recipe into a whole egg, giving some extra egg white that probably would have been there if the eggs were extra large. That’s what I’m telling myself anyway.
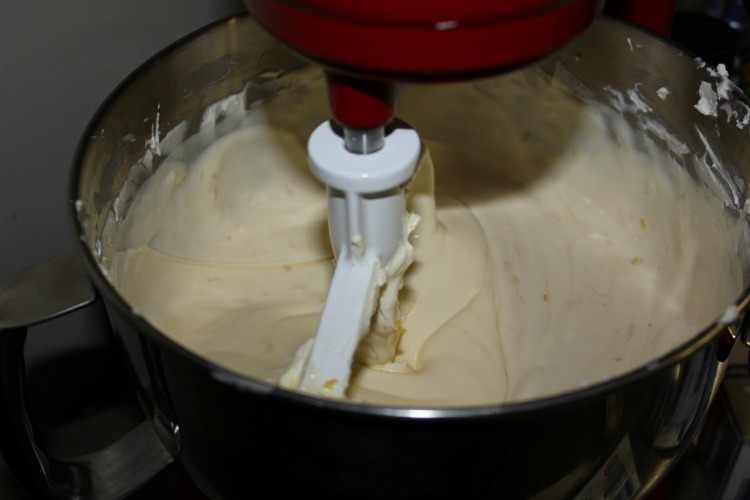
I mixed all those ingredients in my stand mixer, one ingredient at a time, for a good long time before pouring into the crust, which I should have cooled to room temperature if I was following the recipe properly, but instead I left it on the stove while the oven heated up to 450 degrees.
It ended up working out after baking at 450 degrees for 15 minutes, then another 75 minutes at 225 degrees.
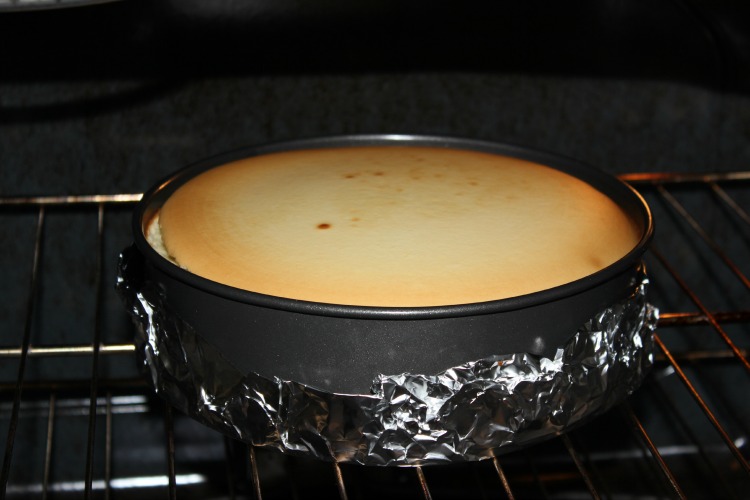
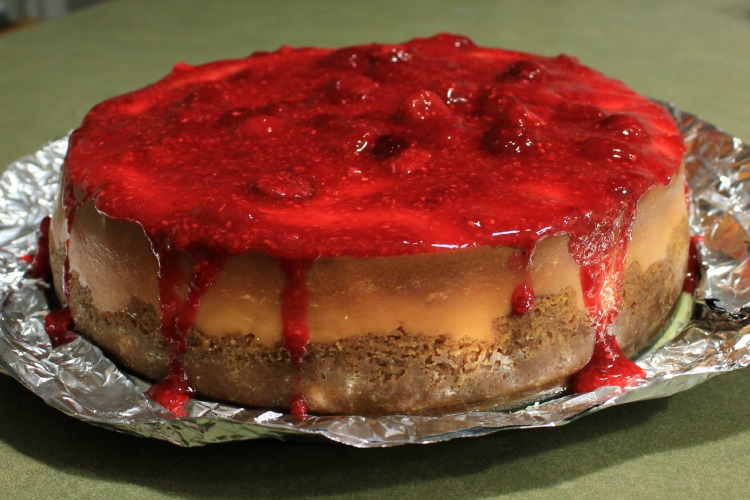
Isn’t it lovely?
I let it cool on the stovetop for about 3 hours before stretching some plastic wrap overtop and putting it in the fridge overnight to set completely.
The next day (Valentines 2.0), all I had to do was make a nice raspberry topping to spread on the cake.
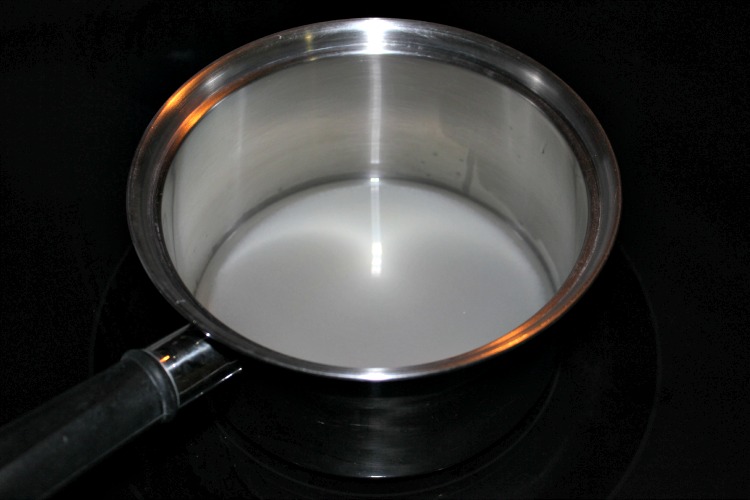
In a saucepan, I heated the sugar and water until the sugar was completely dissolved.
I then poured about ¾ of the bag of frozen raspberries into the mixture, gave it a good stir to thaw out the berries, then blended them with my immersion blender until nice and smooth.
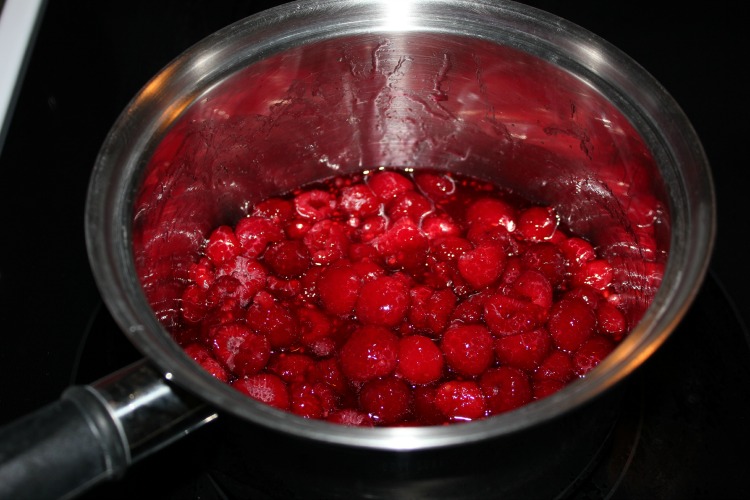
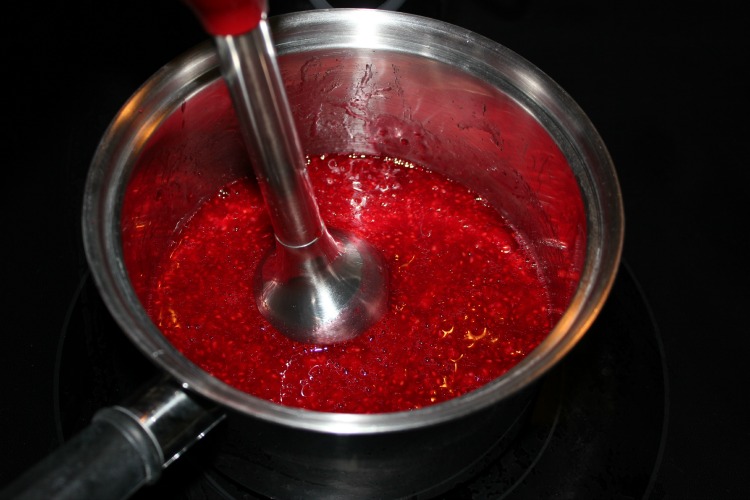
At this point, I poured in the remainder of the berry bag, gave it another stir and set it aside until I was ready to pour onto the cake.
And here it is, the final product! (please excuse the blurriness, this was literally the best picture I got of it. I’ll try to take a better one of another slice today and replace it)
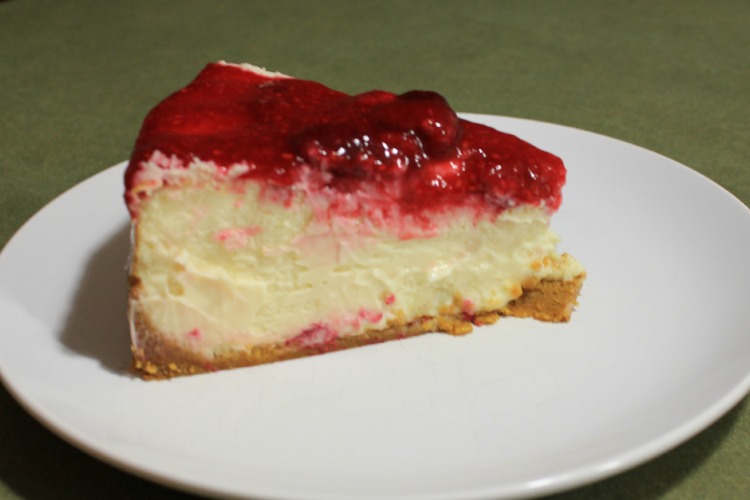
I’m glad I only used the zest of one lemon instead of two as listed in the original recipe. I think having two lemons would have been overpowering.
Chris was super impressed (as was I!). This decadent dessert will certainly be made again, but only as an extra special treat. I now know why restaurants charge eight bucks for their cheesecake slices. Chris, who bought all the groceries, says it cost about $50 to buy all the ingredients for it, mostly because of the cream cheese. Since we sliced it in eight, that works out to $6.25 a slice!
And it’s worth every penny.
What’s the best dessert you’ve ever made?
This post has been shared with pride at:
Emmy Mom #bestoftheblogosphere Linky Party
The SITS Girls Saturday Sharefest
GingerSnap Crafts Wow Me Wednesday


This looks amazing!! I am not the best when it comes to baking, mostly because I hate making a mess, and I’m impatient lol. This really looks so tasty, you’re making me hungry! Thanks for sharing!! #shinebloghop
Thank you Brittany! It was every bit as tasty as it looked. I almost didn’t want to cut it! I’m fairly new to baking so everything takes twice as long as it normally would, but I find it fun :).
Oh my goodness! I LOVE cheesecake but woah that’s a pricey cheesecake! LOL
Thanks for sharing.
xoxo
I know! My husband picked up the ingredients, so I didn’t really know how much it all cost until he told me. I think future cheesecakes made in this house will be scaled down a bit, but I’ll keep this recipe for EXTRA special occasions :D.
Oh my goodness this looks amazing! Thanks so much for linking this post up for the Best of the Blogosphere linky party! Hope to see you again next week!
Thanks! This is my first time trying something like this. I’m glad it turned out :).